
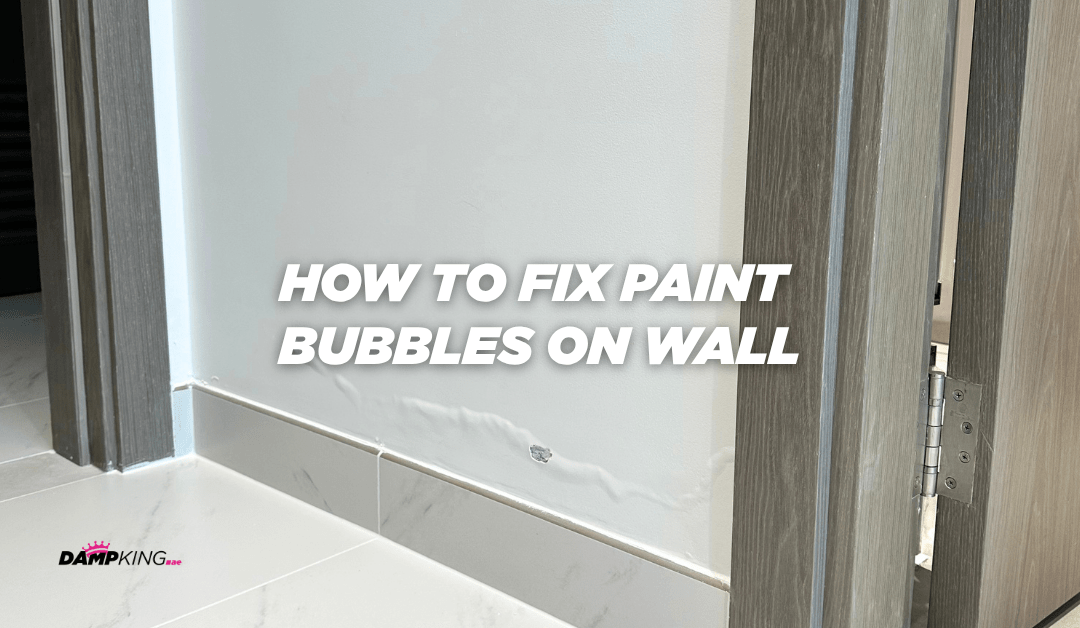
Paint bubbles on a wall usually mean the paint has lost its bond with the underlying surface. This can happen due to moisture, condensation, heat, poor surface preparation, or painting over an old, unstable coating.
In Dubai, bubbling paint is often linked to dampness around bathrooms, air-conditioning units, balconies, external walls and lower ground-floor areas. The hot climate, humid coastal air and regular use of air conditioning can create conditions in which moisture becomes trapped between the wall and the paint.
The correct repair starts with finding the cause. If you simply scrape the bubbles away and apply fresh paint, the same problem may return within a short time.
What causes paint bubbles on walls?
Paint bubbles, also called paint blisters, form when the paint separates from the wall surface. Moisture can push the paint away from the wall, while heat can make air and moisture expand beneath the coating.
A damp wall may develop bubbles after a plumbing leak, roof leak, balcony leak or air-conditioning drainage problem. Condensation can also affect walls near cold air-conditioning ducts, windows and poorly ventilated bathrooms.
Sometimes the wall is completely dry, and the cause is poor preparation. Dust, oil, grease, loose old paint or an unsuitable primer can stop the new paint from sticking properly. Applying a second coat before the first coat has dried fully may also lead to bubbling, especially in a warm or humid room.
The position of the bubbles can offer a useful clue. Bubbles below an air-conditioning unit may indicate condensation or a blocked drain. Bubbles near the floor may be connected to rising moisture. Bubbling beside a bathroom may indicate plumbing or waterproofing issues. Bubbles on an external wall may be linked to cracks, rainwater or damaged waterproofing.
Should you press a paint bubble?
Pressing a small bubble gently can help you understand what may be happening underneath the paint. If the area feels wet, soft or unusually cool, moisture may be present behind the coating.
Water, a damp smell or soft plaster suggests that the wall requires further investigation before any paint repair takes place. In this situation, scraping and repainting the surface may only hide the visible damage for a short period.
If the area feels completely dry, the problem may be related to poor adhesion, old paint or inadequate surface preparation. Even then, the loose coating should be removed carefully, and the wall should be inspected before repainting.
Do not press large bubbles aggressively or break open a mould-affected area. A professional assessment is more suitable when the damage is widespread, wet or returning repeatedly.
Find and fix the moisture source first
The most important step is to find out whether moisture is causing the paint to bubble. Check the walls on both sides where possible and inspect nearby plumbing, bathrooms, kitchens, windows, balconies and air-conditioning units.
In Dubai properties, air-conditioning condensation deserves particular attention. A blocked condensate pipe or overflowing drain can allow water to collect around the indoor unit and spread into the surrounding wall. Poor insulation around cold ducts may also lead to condensation appearing as dampness or bubbling paint.
Look for signs such as dark staining, peeling paint, white deposits, mould, a musty smell or soft plaster. These signs suggest that the wall may have a moisture problem rather than a simple paint defect.
If a leak is found, repair it before removing and repainting the surface. Where moisture enters through an external wall, balcony, roof or wet area, suitable waterproofing may be required. If the dampness is rising from the lower part of the wall, the property may need damp-proofing and a damp-proof course assessment.
Damp King can inspect recurring dampness, paint bubbling and moisture-related wall damage in Dubai and UAE properties. The team can help identify whether the problem requires damp-proofing, waterproofing or surface treatment.
Remove the loose and bubbling paint
Once the moisture source has been dealt with and the wall has dried properly, remove the damaged paint. Use a sharp scraper or putty knife to carefully lift the loose coating.
Continue scraping until you reach a firm edge where the paint remains securely attached to the wall. Avoid leaving thin, loose sections around the damaged area because they may begin to peel again after repainting.
There is no benefit in removing sound paint from the entire wall unless the coating is loose across a much wider area. The aim is to remove unstable material and prepare a solid surface for repair.
If the wall is damp, crumbly or badly damaged underneath the paint, scraping alone may not be enough. The affected plaster may require further treatment before a new coating can be applied.
Sand the edges until they feel smooth
After removing the bubbling paint, sand the edges around the repair area. Fine-grit sandpaper helps create a gradual transition between the exposed wall and the existing paint.
Run your hand gently across the surface once the sanding is complete. You should not feel a sharp ridge between the old paint and the bare area. Any raised edge can remain visible after repainting, particularly when light falls across the wall from the side.
Take care when sanding older paint or damaged plaster. If the surface produces excessive dust, breaks away easily or reveals more dampness, stop and arrange a closer inspection.
Clean the wall before applying filler
Dust left behind after scraping and sanding can prevent filler, primer and paint from bonding properly. Wipe the area with a clean, slightly damp cloth and allow it to dry.
Do not soak the wall, especially if the plaster has already been affected by moisture. Excess water can delay drying and make it more difficult to establish whether the original dampness has been resolved.
The surface should be clean, dry and firm before you apply any repair material. Grease, dirt, dust and loose powder should all be removed from the damaged area.
Fill holes and damaged sections
Scraping paint away may leave shallow holes, dents or uneven sections in the wall. Apply a suitable wall filler, joint compound or spackle in a thin layer.
Allow the filler to dry according to the product instructions, then sand it flat. More serious damage may need more than one thin application. Applying a very thick layer at once can lead to cracking or uneven drying.
The finished area should feel level with the surrounding wall. Shine a light across the surface or view it from different angles to check for dips and raised sections before moving to the priming stage.
If the filler continues to feel damp, soft, or powdery, stop the repair. This may indicate that moisture remains inside the wall.
Apply primer to the bare area
Primer helps seal and prepare the repaired section before the final paint is applied. Apply primer over the bare filler and any exposed wall surface.
A suitable primer can improve adhesion and help prevent the repaired area from absorbing paint differently from the rest of the wall. This is particularly important when the repair exposes fresh filler or porous plaster.
Allow the primer to dry fully before applying the top coat. Painting over wet or partly dry primer can affect the finish and may contribute to further blistering.
Where the wall has had a history of dampness, the type of primer matters. A standard decorative primer may not be enough if moisture continues to move through the wall. The damp-proofing or waterproofing work should be completed before the final decorative finish.
Repaint in thin, even layers
Once the primer has dried, apply a matching paint in thin, even layers. Use a roller or brush that suits the existing wall finish and avoid applying excessive paint in a single pass.
Allow the first coat to dry before applying another coat. In Dubai, rooms can feel dry on the surface while moisture remains trapped underneath, especially when the wall has recently been repaired or the room has poor airflow.
The new paint may look slightly different from the surrounding area because the existing wall has aged, faded or collected marks over time. If the repaired patch remains visible, repainting the complete wall may create a more consistent finish.
Do not close the room immediately after painting if the wall still needs to dry. Allow suitable ventilation while keeping dust and strong outdoor humidity under control.
Why do paint bubbles return after repair?
Paint bubbles often return because the original cause was never treated. Repainting cannot stop a leaking pipe, damaged waterproofing, condensation or rising moisture.
The problem may also return when the wall was painted before it had dried properly.
Another common reason is poor preparation. Dust, grease, loose paint and the absence of a suitable primer can all weaken the bond between the new coating and the wall.
In Dubai, recurring bubbles around an air-conditioning unit should be checked for condensate drainage and insulation problems. Bubbles near the bottom of a ground-floor wall may require a damp-proofing assessment. Damage around a balcony, window or external wall may require waterproofing.
When paint bubbles appear again in the same location, treat them as a warning sign. Repeated scraping and repainting can make the surface look temporarily better while the underlying wall continues to deteriorate.
Can humidity cause paint bubbles in Dubai?
Yes, humidity can contribute to paint bubbling, particularly when moisture becomes trapped behind the coating or when a wall remains cool because of air conditioning.
Bathrooms, kitchens, bedrooms with limited airflow, and rooms with large wardrobes against external walls may be more vulnerable. Condensation may form on cooler areas and gradually affect the paint adhesion.
Improving ventilation can help, but it will not resolve an active leak or a waterproofing defect. Use bathroom and kitchen extraction, maintain air-conditioning systems, and allow air to circulate around furniture.
If the bubbles continue to grow or appear in several areas, arrange a professional assessment. The property may have a wider dampness or waterproofing problem.
Is bubbling paint a sign of dampness?
Bubbling paint can be a sign of dampness, but moisture is not the only possible cause. Poor surface preparation, unsuitable paint, heat, and painting over an unstable coating can also produce bubbles.
The condition of the wall underneath provides useful information. Wet plaster, a musty smell, staining, mould, or white deposits suggest that moisture may be involved. A dry wall with clean, sharp areas of paint separation may be more consistent with an adhesion or preparation problem.
A professional should assess recurring or widespread bubbling before the surface is repaired. This helps prevent the same damage from appearing again after repainting.
When should you contact Damp King?
You should contact Damp King when the paint bubbles are wet, spreading, returning after repainting, or connected to mould and damp plaster. Professional help is also recommended when the damage appears near a bathroom, air-conditioning unit, roof, balcony or the lower part of a wall.
Damp King provides damp-proofing services for apartments, villas, offices and commercial properties across Dubai and the UAE. The service focuses on identifying the reason for the damp and recommending a suitable treatment.
Depending on the inspection, the required work may involve rising damp treatment, a damp-proof course, moisture control or preparation of the affected wall before redecoration.
The Damp King approach is practical and property-specific. Instead of treating every paint bubble as a simple decoration issue, the team considers the location, pattern and likely cause of the damage.
Damp King can identify whether the issue is only affecting the paint surface or whether moisture is building up behind the wall. That matters because paint bubbles are often a sign of a deeper problem, not just a decorating issue.
To fix paint bubbles on a wall, our experts remove the loose paint and damaged plaster, install the damp-proofing solution, smooth the edges, clean the surface, repair any damaged sections, apply primer, and repaint with thin, even coats of breathable paint. However, this process should only begin after checking whether moisture is affecting the wall.
Whether the bubbles are caused by a leak, condensation, poor waterproofing, or rising damp, the moisture source must be treated first. Otherwise, the paint will bubble again, and the wall will suffer further damage.
For recurring bubbling paint, mould, damp patches or peeling plaster in a Dubai property, contact Damp King for a professional damp-proofing assessment.