
Epoxy grout is renowned for its durability, water resistance, and longevity—qualities that make it excellent for high-moisture areas like showers and kitchens. However, these same properties make epoxy grout exceptionally challenging to remove when mistakes occur during installation or when renovation becomes necessary. Whether you’re dealing with discoloured grout lines, installation errors, or stubborn epoxy haze, this comprehensive guide will walk you through effective removal methods. Moreover, we’ll explore when professional intervention becomes the most practical solution.
About Grout King – Dubai’s Epoxy Grouting Specialists
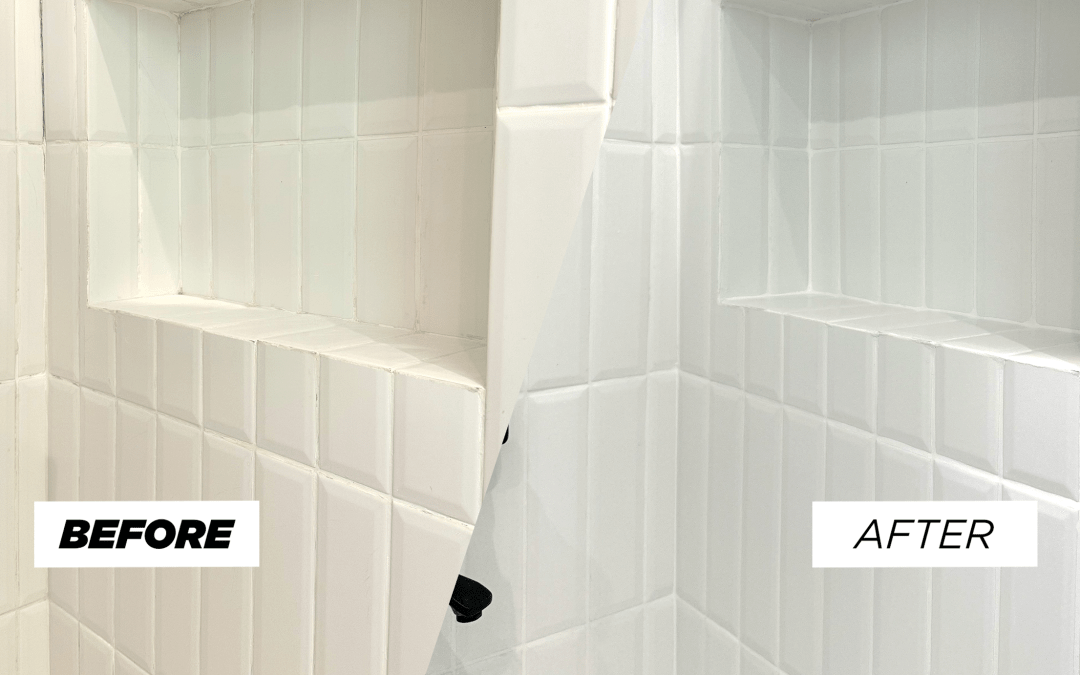
Before delving into removal techniques, it’s worth noting that expert assistance is available when you need it. Grout King is Dubai’s premier grouting service provider, specialising in professional grouting installation, grout cleaning, grout restoration, and comprehensive tile maintenance. With extensive experience serving residential and commercial clients throughout the UAE, Grout King combines expert craftsmanship with premium materials—including epoxy grout systems—to deliver exceptional, lasting results. Our skilled technicians understand the unique challenges of epoxy grout, from proper installation techniques to safe removal when necessary. Whether you’re facing challenges with epoxy grout removal or require expert installation services, Grout King provides tailored solutions that protect your investment whilst delivering outstanding results.
Understanding Epoxy Grout: Why It’s So Difficult to Remove
Before attempting removal, it’s essential to understand what makes epoxy grout uniquely challenging. Unlike traditional cement-based grout, epoxy grout consists of epoxy resins and hardeners that create a thermosetting polymer. This means the grout undergoes a chemical reaction during curing, forming a cross-linked molecular network—essentially a “mega molecule” that cannot be reversed or dissolved by ordinary solvents.
Consequently, acetone, lacquer thinner, and similar common solvents that work on other adhesives have virtually no effect on cured epoxy. Furthermore, epoxy grout’s exceptional adhesion and chemical resistance—the very properties that make it desirable—become significant obstacles during removal. This is why immediate cleanup during installation is absolutely critical, and why removal after curing requires specialised approaches.
Method 1: Scraping and Mechanical Removal
For fresh or partially cured epoxy grout, mechanical removal offers the safest starting point.
What You’ll Need:
- Stiff scraper or putty knife.
- Manual grout saw.
- Oscillating multi-tool with grout removal blade.
- Rotary tool with diamond or carbide bits.
- Safety glasses and a dust mask.
- Vacuum cleaner.
Step-by-Step Process:
- Begin with hand scraping: Use a stiff scraper to attempt removal of surface epoxy. This works best within the first 24-48 hours after application, before full curing occurs.
- Progress to manual grout saws: For grout within the joints, manual grout saws allow controlled removal without power tools. Whilst tedious—especially with narrow grout lines—this method minimises tile damage risk. However, be prepared for significant physical effort and time investment.
- Use an oscillating multi-tool: This represents the most practical power tool option for epoxy grout removal. Fit the tool with a grout removal blade and work slowly along the grout lines, allowing the blade to do the work. The oscillating action provides control whilst minimising vibration that could crack tiles.
- Consider rotary tools for detailed work: A Dremel or similar rotary tool fitted with diamond or carbide bits works well for corners, edges, and detailed areas. Use moderate speed and let the bit cut gradually—forcing it increases heat and tile damage risk.
Important consideration for narrow grout lines: With very narrow lines (1.5 mm or less), mechanical removal becomes exceptionally challenging. In such cases, consider whether installing fresh epoxy over the existing grout might be viable, or whether professional assistance would be more efficient.
Method 2: Heat Gun Softening Technique
Heat represents one of the most effective methods for epoxy grout removal because it exploits epoxy’s thermosetting properties.
Understanding the Science:
Epoxy resins have a glass transition temperature (Tg)—the point at which the rigid polymer softens and becomes pliable. By applying controlled heat, you can temporarily soften the epoxy, making mechanical removal significantly easier. Nevertheless, this method requires patience and careful technique to avoid tile damage.
What You’ll Need:
- Heat gun with temperature control.
- Scraper or putty knife.
- Work gloves (heat-resistant).
- Safety glasses.
- Well-ventilated workspace.
Step-by-Step Process:
- Set up proper ventilation: Heating epoxy releases fumes, so work in a well-ventilated area. Open windows and use fans if working indoors.
- Start with moderate heat: Begin with your heat gun on a medium setting (around 200-250°C). Hold it 10-15 cm from the grout line and move it slowly along the joint.
- Watch for softening: After 30-60 seconds of heating, test the grout with your scraper. When properly softened, the epoxy becomes gooey and pliable. If it remains hard, continue heating.
- Scrape immediately: As soon as the epoxy softens, scrape it out quickly before it cools and hardens again. Work in small sections—attempting too large an area allows previously softened grout to re-harden whilst you’re working elsewhere.
- Repeat systematically: Continue this heat-and-scrape cycle along all grout lines. This method is time-consuming but significantly more effective than scraping alone.
Critical warnings:
- Never hold the heat gun stationary—constant movement prevents tile cracking from thermal shock.
- Avoid excessive heat that could crack or discolour tiles.
- Natural stone tiles are particularly sensitive to heat—test in an inconspicuous area first
- Be extremely cautious around acrylic tubs, plastic fixtures, or painted surfaces, as heat will damage them.
Alternative Heat Method: Boiling Water Immersion
For removable items or horizontal surfaces where water containment is possible, boiling water immersion offers another approach. Immersing epoxy-bonded items in boiling water for approximately one hour softens most epoxy formulations sufficiently for mechanical separation. However, this method is rarely practical for installed tile work.
Method 3: Chemical Epoxy Removers and Strippers
When mechanical and heat methods prove insufficient, chemical removers offer another avenue—though with significant limitations and safety concerns.
Dedicated Epoxy Grout Strippers
Several manufacturers produce epoxy grout haze removers specifically formulated for this purpose. These products work through differential swelling—they penetrate the epoxy network, causing it to swell and soften until outer layers break away from inner layers.
Application process:
- Apply the stripper generously to affected areas following the manufacturer’s instructions.
- Allow extended dwell time—often several hours or overnight for cured epoxy.
- Keep the area wet; reapply if the product begins drying.
- Scrub with a stiff brush or abrasive pad.
- Use a wet/dry vacuum to remove loosened material rather than spreading it around
- Rinse thoroughly and repeat if necessary.
Important notes: Even dedicated epoxy removers often prove ineffective on fully cured epoxy (weeks or months old). Furthermore, these products can potentially harm certain tile finishes or the remaining epoxy grout you wish to keep, so always test in an inconspicuous area first.
Methylene Chloride-Based Paint Strippers
Methylene chloride (dichloromethane) is one of the few substances that can break down cured epoxy through differential swelling. However, this comes with serious health and safety concerns.
Critical safety information:
- Methylene chloride is extremely toxic and potentially carcinogenic.
- It damages the ozone layer.
- It can cause severe chemical burns to the skin and eyes.
- It evaporates rapidly (boils slightly above room temperature).
- Requires exceptional ventilation—outdoor use only if possible.
- Mandatory protective equipment: chemical-resistant gloves, safety goggles, long sleeves, respirator.
Application process (if you choose this route):
- Ensure excellent ventilation—this cannot be overstated.
- Wear full protective equipment.
- Apply the methylene chloride stripper to the epoxy and cover with plastic wrap to slow evaporation.
- Allow several hours of soaking time—check periodically.
- As the epoxy swells and softens, scrape away loosened material.
- Reapply and repeat as necessary.
- Clean up thoroughly, properly disposing of all chemical waste.
Honest assessment: Given the extreme toxicity, environmental concerns, prolonged application time, and inconsistent results, methylene chloride should be considered only as an absolute last resort. Professional removal or even tile replacement often proves safer, faster, and more practical.
N-Methyl Pyrrolidone (NMP): A Safer Alternative
N-Methyl Pyrrolidone offers a less toxic alternative to methylene chloride, though it still requires careful handling.
Advantages over methylene chloride:
- Significantly lower toxicity.
- Evaporates much more slowly than water.
- High boiling point (above 150°C) allows heated application.
- More straightforward handling.
Application method:
- Apply NMP generously to the affected area.
- For enhanced effectiveness, heat in a double-boiler setup to approximately 100°C (use extreme caution).
- Allow extended soaking time—several hours minimum.
- Apply shear stress (push sideways) to break the softened bond.
- Scrape away loosened epoxy.
Whilst safer than methylene chloride, NMP still requires protective gloves and eye protection, plus good ventilation.
Goof-Off and Similar General Removers
These petroleum-based solvents sometimes provide mild success on very fresh epoxy but prove largely ineffective on cured material. Nevertheless, they’re worth attempting before progressing to harsher chemicals, particularly for surface haze rather than grout within joints.
Warm Sulphuric Acid (Professional Use Only)
Warm sulphuric acid can decompose epoxy, but it represents an extremely dangerous substance requiring professional handling. This method is mentioned for completeness, but is absolutely not recommended for DIY application due to severe burn risk and chemical hazards.
Method 4: Abrasive Removal for Epoxy Haze
When dealing specifically with epoxy haze on tile surfaces (rather than grout removal from joints), abrasive methods often prove most effective.
Silica Sand Scrubbing Method
This technique, recommended by tile professionals, works particularly well on durable porcelain tiles:
What you’ll need:
- Clean silica sand (fine grade).
- Liquid detergent or washing-up liquid.
- Stiff scrubbing pad or brush.
- Wet/dry vacuum.
- Protective gloves.
Step-by-step process:
- Test first: Always test this abrasive method on an inconspicuous area to confirm your tile surface can withstand it without visible scratching.
- Create a scrubbing mixture: Combine silica sand with liquid detergent and a small amount of water to create a paste-like consistency.
- Apply and scrub: Work the mixture over the epoxy haze using a stiff brush or pad, applying moderate pressure. The sand acts as an abrasive that physically removes the epoxy layer.
- Work in small sections: Complete one area thoroughly before moving to the next, keeping the surface wet throughout.
- Vacuum the slurry: Use a wet/dry vacuum to remove the wet slurry rather than wiping or mopping, which merely spreads it around.
- Rinse and inspect: Rinse the area thoroughly with clean water and inspect your progress. Repeat if necessary.
Important limitations: This method works only on very hard, durable tile surfaces—typically high-quality porcelain. This approach will likely damage natural stone, glazed ceramic with delicate finishes, or textured tiles.
Sanding and Filing
For localised epoxy spots or small areas, careful sanding or filing offers another option:
- Use fine-grit sandpaper (220 grit or higher) to minimise visible scratching.
- Work slowly and check progress frequently.
- Keep the work area damp to reduce dust.
- This method works best on unglazed tiles where minor surface abrasion won’t be visible.
Removing Epoxy from Specific Surfaces.
Acrylic Tubs and Fixtures
Epoxy grout on acrylic surfaces presents unique challenges because acrylic is relatively soft and easily scratched or damaged by heat and harsh chemicals.
Recommended approach:
- Try gentle scraping with a plastic scraper first.
- Apply a commercial epoxy remover designed for sensitive surfaces.
- Use patience—multiple applications with extended dwell times.
- Avoid heat guns, which will melt or warp acrylic.
- Never use abrasive methods or harsh solvents that will permanently damage the finish
Honest assessment: Successfully removing cured epoxy from acrylic without damage is exceptionally difficult. In many cases, professional refinishing of the affected fixture proves more practical than removal attempts.
Textured Tiles
Textured tile surfaces trap epoxy haze within their contours, making removal particularly challenging:
- Chemical removers must be applied generously and given an extended dwell time.
- Use stiff brushes to work cleaner into the texture.
- Multiple treatment cycles are typically necessary.
- Complete removal may not be achievable without damaging the texture.
Power Tool Method: Diamond Blade Cutting
For complete grout line removal when re-grouting is planned, power tools with diamond blades offer efficiency, though with risks.
What You’ll Need:
- Angle grinder with a diamond blade, or an Oscillating tool with a diamond blade.
- Safety glasses, a dust mask, and ear protection.
- Vacuum with HEPA filter (traps very fine particles of air) for dust collection.
- Steady hands and experience with power tools.
Process and Considerations:
- Oscillating tools provide the most control: Their limited side-to-side motion reduces the risk of blade wander that could damage tiles.
- Mark your depth: Use tape or a depth guide to prevent cutting too deeply and damaging the substrate beneath the grout.
- Work slowly and steadily: Let the tool do the work—forcing it increases heat, wears the blade faster, and raises tile damage risk.
- Manage dust: Epoxy dust is unhealthy—use proper dust collection and respiratory protection.
Critical warning for narrow grout lines: With very narrow joints (1/.5 mm or less), the risk of tile damage becomes extremely high. The blade width may exceed the grout line width, making tile contact inevitable. In such cases, this method is simply not viable.
When Removal Isn’t Practical: Alternative Solutions
Sometimes, complete epoxy grout removal proves so difficult, time-consuming, or risky that alternatives become more sensible.
Epoxy Grout Coating/Paint
Several manufacturers produce epoxy-based grout coatings that can be applied over existing grout to change its colour:
Advantages:
- Covers discoloured or mismatched grout without removal.
- Relatively quick application.
- Available in colours matched to standard grout lines.
- It can be applied with a small brush or toothbrush for precision.
Process:
- Clean existing grout thoroughly to ensure good adhesion.
- Apply the coating carefully using a small brush, keeping it within the grout lines.
- Wipe excess from tile surfaces immediately.
- Allow to cure according to the manufacturer’s instructions.
- Even a thin film will effectively cover colour problems.
This solution works particularly well when discolouration is the primary issue rather than structural problems or excess grout thickness.
Preventing Epoxy Grout Problems
Prevention dramatically outweighs cure when working with epoxy grout. These professional techniques minimise problems:
Proper Planning and Preparation
- Order correctly: Purchase one complete kit per distinct area, plus one extra kit. Don’t attempt to stretch one kit across multiple areas—once the working time expires, the material becomes unworkable.
- Work in appropriate sections: Only grout as much area as you can properly clean within the pot life (typically 45-60 minutes).
- Prepare cleaning materials in advance: Have multiple clean sponges, buckets of clean water, and cleanup supplies ready before mixing grout.
- Read manufacturer instructions thoroughly: Different epoxy formulations have varying pot lives, cleaning requirements, and application techniques.
Application Best Practices
- Apply with proper tools: Use a rubber grout float held at 45 degrees, working diagonally across tiles.
- Remove excess immediately: Don’t allow excess grout to sit on tile surfaces—scrape it off and return it to the bucket whilst still workable.
- Use appropriate water amounts: Too little water won’t adequately clean tiles; too much water dilutes the epoxy in grout lines, causing discolouration and weakness.
- Clean progressively: Don’t wait until all grouting is complete—clean as you go, section by section.
Cleanup Techniques
- First pass—damp sponge: Use a barely damp sponge in circular motions to remove surface epoxy. Rinse and wring the sponge frequently in clean water.
- Second pass—detailed cleaning: Once the grout has firmed slightly (20-30 minutes), clean more aggressively with a slightly wetter sponge.
- Final buff: When grout is firm but not fully cured, buff tile surfaces with a dry microfiber cloth to remove any remaining haze.
- Address problems immediately: If you notice haze forming, address it within the first few hours when removal is exponentially easier.
When to Call Professional Help
Epoxy grout removal represents one of the most challenging DIY tiling tasks. Professional assistance makes sense when:
- Extensive areas require removal: What might take you weeks of exhausting work, professionals can complete in days with specialised equipment.
- Narrow grout lines are involved: Professional-grade precision tools handle narrow joints with less tile damage risk.
- The epoxy is fully cured: Month-old or year-old epoxy often proves simply impractical for DIY removal.
- Valuable or delicate tiles are involved: When tiles are expensive, antique, or irreplaceable, professional care minimises costly damage risk.
- Previous removal attempts have failed: If you’ve already tried multiple methods without success, professionals have access to industrial-strength products and techniques unavailable to consumers.
- Health and safety concerns exist: If methods requiring toxic chemicals appear necessary, professional handling eliminates personal exposure risks.
Grout King’s experienced technicians regularly handle challenging epoxy grout situations. With professional-grade equipment, comprehensive knowledge of various epoxy formulations, and access to commercial removal products, we can assess your specific situation and determine the most effective approach. Whether mechanical removal, controlled heating techniques, or strategic coating solutions prove most appropriate, our team works efficiently to resolve your epoxy grout challenges while protecting your tile investment.
Conclusion
Removing epoxy grout is undeniably one of the most challenging tile-related tasks due to the material’s exceptional durability and chemical resistance. Success depends on choosing the appropriate method for your specific situation—considering factors like how long the epoxy has cured, whether you’re removing haze or complete grout lines, and your tile type.
Start with the safest, least aggressive approaches: mechanical scraping and heat softening. Progress to chemical removers only when necessary, always prioritising safety with proper protective equipment and ventilation. Remember that some situations genuinely warrant alternative solutions like epoxy coating or complete tile replacement rather than heroic removal efforts.
For Dubai residents facing epoxy grout challenges—whether removal, installation, or restoration—Grout King offers professional solutions backed by extensive experience. Our team understands both the benefits of epoxy grout systems and the complexities of working with them, providing expert service whether you’re planning a new installation or addressing existing problems. Contact Grout King for professional grouting services that deliver lasting quality without the frustration of DIY epoxy challenges.